Ground Beef and Rice: 5 Easy Steps for Quick Dinner
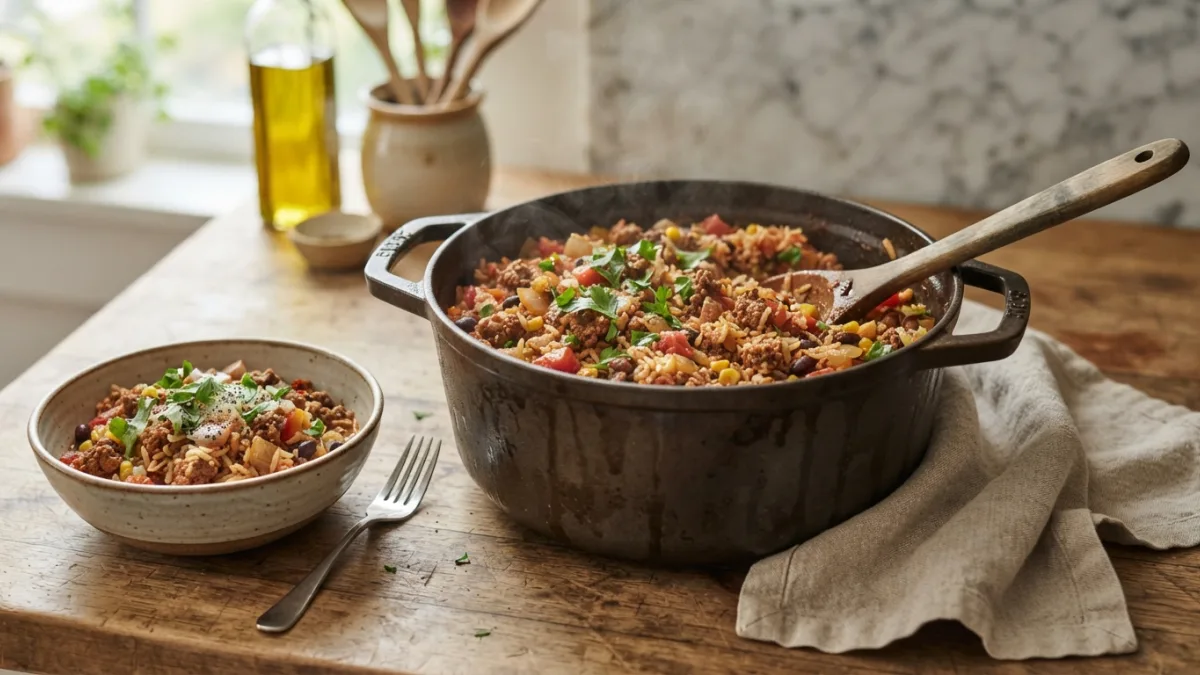
There’s a certain magic in a dinner that comes together in one pot, uses ingredients already sitting in your pantry, and satisfies the whole family without a mountain of dishes afterward. Ground beef and rice is exactly that kind of meal — hearty, budget-friendly, and endlessly adaptable to whatever spices or vegetables you have on hand. Whether you’re juggling a busy work schedule, cooking for picky kids, or just craving something warm and filling, this dish delivers comfort food in half an hour, start to finish.
Why This One-Pot Meal Is a Weeknight Lifesaver
Anyone who has tried to plan dinners for a week knows the appeal of recipes that don’t demand three pans and an hour of prep. One-pot meals cut down on cleanup, save energy, and often taste better because the flavors mingle as everything cooks together. Ground beef and rice checks every box for a practical weeknight dinner: it’s inexpensive, it reheats well, and it uses simple techniques that even beginner cooks can master. According to the USDA’s guidance on grains, rice provides a solid base of carbohydrates and, when paired with a protein like ground beef, creates a more balanced plate without much extra effort. If you want to dig deeper, our guide on Chicken and Rice: 5 Easy One-Pot Recipes to Make Tonight covers this in more detail.
5 Easy Steps for Ground Beef and Rice in 30 Minutes
Getting a satisfying one-pot dinner on the table doesn’t require culinary school training. It just requires the right order of operations, since rice and beef cook at slightly different rates and need to be layered correctly to avoid mushy grains or dry meat. Follow these five easy steps and you’ll have a complete meal ready before the timer even feels like it’s started. Each stage builds on the last, so the flavors deepen while the rice absorbs everything simmering around it.
Step 1: Brown the Ground Beef
Start by heating a large, deep skillet or Dutch oven over medium-high heat. Add your ground beef directly to the dry pan — no oil needed, since the beef releases its own fat as it cooks. Break it into small crumbles with a wooden spoon and let it brown for about five to seven minutes, stirring occasionally so it cooks evenly rather than steaming. This step matters more than people realize, because those browned bits stuck to the bottom of the pan are packed with flavor that will later season your rice. Once the beef reaches a safe internal temperature, drain off excess grease, leaving just enough to sauté the next ingredients. The USDA’s food safety guidelines recommend cooking ground beef to 160°F to ensure it’s fully safe to eat.
Step 2: Sauté Aromatics and Build Flavor
With the beef browned and set aside or pushed to one side of the pan, add a small amount of oil or butter along with diced onion and minced garlic. Cook for two to three minutes until the onion turns soft and translucent and the kitchen starts smelling irresistible. This is also the moment to stir in any spices you’re using, like paprika, cumin, chili powder, or Italian seasoning, since toasting spices briefly in fat wakes up their flavor. If you like a bit of heat, a pinch of red pepper flakes works well here too. Building this flavor base before adding liquid is what separates a bland, one-note dish from something people actually ask you to make again. This connects closely with another common issue — see One-Pot Pasta: 5 Recipes With Almost No Cleanup for more on that.
Step 3: Add Rice, Liquid, and Seasonings
Now stir the raw rice directly into the pot, coating each grain in the beef drippings and aromatics — a trick borrowed from pilaf-style cooking that helps keep the rice from clumping later. Pour in your broth or water, using roughly the ratio your rice package suggests, then add salt, pepper, and any additional seasoning like soy sauce, Worcestershire sauce, or a can of diced tomatoes for extra moisture and tang. Scrape the bottom of the pan with your spoon while stirring, lifting up any browned bits so they dissolve into the liquid. Bring everything to a gentle boil before moving to the next step, since starting with a boil helps the rice cook evenly once you reduce the heat.
Step 4: Simmer Until Rice Is Tender
Once the liquid reaches a boil, reduce the heat to low, cover the pot tightly with a lid, and let everything simmer undisturbed. Resist the urge to lift the lid and stir constantly, since releasing steam slows down cooking and can leave you with unevenly cooked rice. Depending on the type of rice you use, this stage typically takes 15 to 20 minutes. White rice cooks fastest, while brown rice needs closer to 25 to 30 minutes, so adjust your total time accordingly if you swap grains.
| Rice Type | Approximate Simmer Time | Texture Result |
|---|---|---|
| White rice | 15–18 minutes | Light, fluffy |
| Instant rice | 5–7 minutes | Soft, quick-cooking |
| Brown rice | 25–30 minutes | Chewy, nutty |
Step 5: Rest, Fluff, and Serve
Once the rice has absorbed most of the liquid and looks tender, turn off the heat but keep the lid on for another five minutes. This resting period lets the steam finish the cooking process and allows the grains to firm up slightly, so they don’t turn gummy when you fluff them. Use a fork to gently separate the rice, folding it through the beef and seasonings so every bite gets an even mix of textures and flavors. Top with shredded cheese, chopped green onions, or a dollop of sour cream if you want to dress it up, and dinner is ready to serve straight from the pot. You might also find our article on Sheet-Pan Salmon and Vegetables in 25 Minutes helpful here.
Simple Variations to Keep This Dinner Interesting
One of the best things about ground beef and rice is how easily it adapts to different cuisines and pantry situations. Swap taco seasoning and salsa in for a Tex-Mex spin, or use soy sauce, ginger, and frozen peas for something closer to fried rice. Bell peppers, corn, black beans, spinach, and shredded carrots all stir in beautifully without changing the cooking method. For a lower-carb version, cauliflower rice can replace regular rice, though you’ll want to reduce the added liquid since it releases moisture as it cooks. These small swaps mean you can rotate this recipe into your regular lineup of ground beef recipes without anyone feeling like they’re eating the same dinner twice.
Storage, Reheating, and Meal Prep Tips
Leftovers from this dish hold up remarkably well, which makes it a smart choice for anyone trying to prep lunches ahead of time. Store cooled rice and beef in an airtight container in the refrigerator for up to four days, and reheat gently on the stove or in the microwave with a splash of water or broth to loosen the rice back up. If you want to freeze portions, let everything cool completely first, then transfer to freezer-safe bags or containers, where it will keep well for about two to three months. Just note that rice can sometimes change texture slightly after freezing, becoming a bit firmer, so a quick reheat with added liquid usually solves that. Planning ahead this way turns one cooking session into several easy meals throughout the week.
At its core, this dish proves that 30 minute meals don’t have to mean sacrificing flavor or nutrition for speed. With one pot, a handful of pantry staples, and about half an hour, you get a warm, satisfying dinner that welcomes substitutions and rarely disappoints. It’s the kind of easy weeknight dinner that becomes a household staple precisely because it’s forgiving — a little more garlic here, a swapped vegetable there, and it still turns out well. Once you’ve made ground beef and rice a few times, you’ll likely stop measuring and start cooking by feel, which is really the sign of a recipe that’s earned a permanent spot in your rotation. For a related walkthrough, check out 10 Sheet-Pan Dinners for Busy Weeknights.
Frequently Asked Questions
Can I use any type of rice for this recipe?
Yes, though cooking times will vary. White rice and instant rice cook fastest, while brown rice takes longer and needs extra liquid. Adjust your simmer time based on the package instructions for whichever type you choose.
What’s the best ground beef to use?
An 80/20 or 85/15 blend gives good flavor without leaving the dish too greasy. Leaner beef works too, but you may want to add a bit of extra oil when sautéing the onions and garlic since there will be less rendered fat.
Can I make this dish ahead of time?
Absolutely. It stores well in the refrigerator for several days and freezes nicely for longer storage. Just reheat with a splash of water or broth to bring the rice back to its original texture.
How do I keep the rice from turning mushy?
Avoid lifting the lid too often while it simmers, since that lets steam escape and disrupts even cooking. Letting the pot rest for a few minutes after cooking, before fluffing with a fork, also helps firm up the texture.
Is this recipe freezer-friendly for meal prep?
Yes, it’s a great option for batch cooking. Portion it into freezer-safe containers once fully cooled, and it will keep for up to about three months, making it easy to pull out a ready-made dinner on a busy night.

Ghani Mejber — Founder & Lead Editor
Ghani Mejber is a home cook and the creator of The Quick Pantry. He specializes in simple, budget-friendly weeknight meals, one-pot dinners, and reliable meal-prep strategies designed for busy people who want delicious, comforting food without spending hours in the kitchen.