No Microwave Lunch: 7 Easy Thermos Tips for Hot Food
You know the scene. Your meeting starts in ten minutes, and four people are already waiting at the office microwave. A no microwave lunch solves that problem, and a good thermos is the easiest way to pull it off. Pack your food hot at home, seal the lid, and eat it hours later without pressing a single button. This works on job sites, in classrooms, on long commutes, and at desks with no kitchen nearby. The idea is not new, and it does not need fancy gear. It does need a few smart habits. Get them right, and your stew or rice still steams when you open the lid. Get them wrong, and you eat a sad, lukewarm mess.
The science is simple. A vacuum-insulated container has two walls with almost no air between them, and that gap slows down heat loss. If you want the background, Wikipedia explains how the vacuum flask works. But the gap only helps if you give the jar a fair start. Below you will find seven practical tips, then a section on packing for children and a short FAQ. Most of these steps take less than a minute each. If you want to dig deeper, our guide on Vegetarian Office Lunch Ideas: 7 Easy, No-Stink Recipes covers this in more detail.
Your No Microwave Lunch Game Plan: 7 Tips That Work
Tip 1: Preheat Your Thermos Before You Pack
Here is the habit that matters most: preheat thermos boiling water for five to ten minutes before you add any food. A cold steel wall pulls heat out of your meal fast, and you lose the battle before you leave the house. Boil the kettle, fill the jar to the top, screw on the lid, and let it sit while your food finishes cooking. Then pour the water out and add the food right away. Do not leave the jar open while you wait, because the heat escapes in seconds. This one step can be the difference between a lunch that is hot at noon and one that is only warm. It costs nothing and takes almost no effort.
Tip 2: Choose the Best Insulated Food Jar for Your Meals
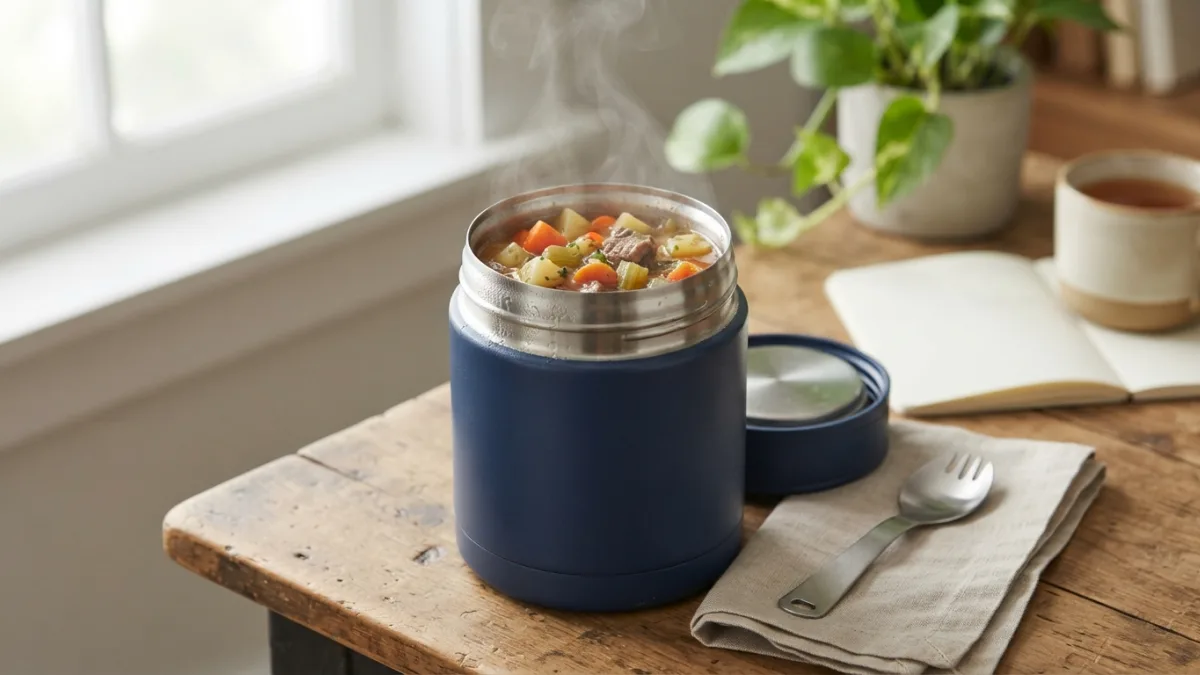
A no microwave lunch is only as good as the container that carries it, so look for the best insulated food jar you can reasonably afford. Stainless steel with double walls and a vacuum layer usually beats plastic by a wide margin. Then check the details that make daily use easier:
- A wide mouth that fits a real spoon and your hand for cleaning.
- A sturdy lid and seal that stay leakproof in a bag.
- The right size. About 12 to 16 ounces (350 to 475 ml) suits many adults for one meal.
- Parts that come apart so you can wash every corner.
Brands differ a lot, so read reviews from people who use their jars every day, not only in the first week.
Tip 3: Keep Food Hot for Hours by Packing It Right
Heat matters, but so does air. To keep food hot for hours, bring your meal to a full, steaming boil on the stove right before you pack it. Warm is not enough. Fill the jar close to the top, because empty space holds air that cools the food faster. Put the lid on at once and leave it closed until you eat, since every peek lets heat out. If your bag gets rough treatment or your commute is cold, slip the jar into an insulated lunch bag. Results vary by brand, jar size, and room temperature, so run a test on a weekend. Check the food at lunchtime and note how it feels. Then you will know what your jar can really do. This connects closely with another common issue — see 15 Minute Lunches: 7 Easy Ideas for Forgetful Days for more on that.
Tip 4: Start With Thermos Soup Recipes
Soup is the natural starting point, and thermos soup recipes are very forgiving. Tomato, lentil, chicken noodle, and vegetable soups all travel well. Cook them at home until they bubble, then ladle them straight into your preheated jar. Thick soups tend to hold heat longer than thin broths, so a hearty bean or lentil soup is a safe bet. Cook any noodles a little firm, because they keep softening inside the jar. Pack toppings like crackers, grated cheese, or fresh herbs in a small separate container and add them at lunch. That way you keep some crunch and a fresh taste. Taste your soup before you pack it, and adjust the salt while it is still on the stove.
Tip 5: Try Thermos Hot Lunch Ideas Beyond Soup
When you plan a no microwave lunch for the whole week, variety keeps you from giving up by Thursday. These thermos hot lunch ideas work because they hold moisture well. Choose dishes with sauce or broth, undercook pasta and rice slightly, and keep crispy items out of the jar. Try one of these:
- Beef or bean chili with a scoop of rice
- Chicken curry with basmati rice
- Pasta in marinara sauce with meatballs
- Mac and cheese made with extra sauce
- Rice and beans with a spoonful of salsa
- Oatmeal with fruit and nuts, packed in a smaller jar
Tip 6: Know the Thermos Food Safety Temperature
Hot food must stay hot to stay safe. The thermos food safety temperature to remember is 140°F (60°C) or higher, which is the line U.S. food safety guidance uses for keeping hot food out of the “danger zone” where bacteria multiply quickly. You can read the basics at FoodSafety.gov and on the USDA Food Safety and Inspection Service site. Test your setup once with a food thermometer: pack a meal as usual, then measure it at lunchtime. If it is far below 140°F, shorten the time, pack it hotter, or switch to a better jar. If your lunch feels only lukewarm after many hours, do not gamble. Throw it out.
Tip 7: Clean Well and Remove Thermos Smell
Even a great jar turns unpleasant if you forget it in your bag over the weekend. To remove thermos smell, start with a full wash right after lunch, including the lid and the rubber gasket, which traps odors. For stubborn smells, try this routine: You might also find our article on Quick Lunch Bowls: 7 Easy Make-Ahead Recipes for Busy Days helpful here.
- Take the lid apart and wash every piece with warm, soapy water.
- Fill the jar with warm water and a spoonful of baking soda, or a mix of white vinegar and water.
- Let it sit for several hours or overnight.
- Rinse well, then let everything air-dry with the lid off.
Storing the jar open, never sealed, helps prevent the smell from coming back.
How to Pack a Hot School Lunch Kids Will Actually Eat
Planning a hot school lunch kids will eat takes a few extra steps. Choose a small, kid-sized jar with a lid your child can open alone, and test it at home first. Fill it with familiar favorites like noodles, mild soups, or rice with chicken, because lunch break is short and children rarely try new foods in a noisy cafeteria. Preheat the jar as usual, and pack a spoon or fork that fits. Remind your child that the food may be very hot at first, so they should open the lid carefully and let the steam escape. Add a cold side like fruit in a separate bag, and check your school’s rules about food and containers.
The Bottom Line on Skipping the Microwave Line
A no microwave lunch is not a compromise. It is a small system that saves time, money, and patience. Preheat the jar, choose a sturdy one, pack the food boiling hot, and keep the lid shut until you are hungry. Start with soup, branch out to curries and pasta, and always think about safe temperatures. Clean the jar well so it stays fresh. Once these steps become routine, you will barely think about them. You will just open your bag at lunchtime, lift the lid, and enjoy a meal that tastes like it just left the stove.
FAQ: No Microwave Lunch and Thermos Basics
How long will food stay hot in a thermos?
It depends on the jar, the food, and the weather. Many quality jars hold heat for several hours if you preheat them and fill them with piping-hot food. Test your own jar with a thermometer. For a related walkthrough, check out Breakfast Ideas Without Eggs: 12 Quick and Easy Options.
Is a no microwave lunch safe to eat?
Yes, if the food stays at 140°F (60°C) or hotter until you eat it. If it has cooled well below that, do not eat it.
Can I pack pasta or rice without it getting mushy?
Yes. Cook it slightly firm, add enough sauce, and keep the jar closed. The food keeps softening in the heat, so a little bite at packing time is a good thing.
Can I use my thermos for cold foods too?
Yes. Insulation works both ways. Chill the jar first with cold water or ice, then add foods like yogurt, pasta salad, or smoothies.
Can I put a thermos in the dishwasher?
Not always. Some jars are dishwasher safe, while others can lose their finish or insulation. Check the maker’s instructions, and hand-wash if you are unsure.

Ghani Mejber — Founder & Lead Editor
Ghani Mejber is a home cook and the creator of The Quick Pantry. He specializes in simple, budget-friendly weeknight meals, one-pot dinners, and reliable meal-prep strategies designed for busy people who want delicious, comforting food without spending hours in the kitchen.